
Phantom Ride learning resource
Phantom Ride (2016) is a two-channel video installation, that resides at ACMI, inside The Story of the Moving Image exhibition, and was created by Daniel Crooks, a Melbourne-based artist working across digital video, photography, sculpture, and installation.
It is an incredibly captivating work, and one that Secondary students in particular, are often drawn to when they visit the exhibition. It's thematically rich, and technically, an incredible achievement. This resource will benefit students studying Visual Arts and Media Arts, both as a work to be analysed, whilst also providing inspiration for students looking to create their own artworks or video-productions.
Year levels: 9-10
Learning areas: Media Arts, Visual Arts
Viewing & responding to Phantom Ride
Before learning more about Crook's intent and inspiration for the work, you should view the work in its entirety.
You do not have to visit ACMI for this, Crook's has made it available on Vimeo. Unfortunately, we cannot embed it on this page, but it is accessible below:
Watch Phantom Ride
Be sure to watch on the largest or highest-quality screen accessible, and enter full-screen mode.
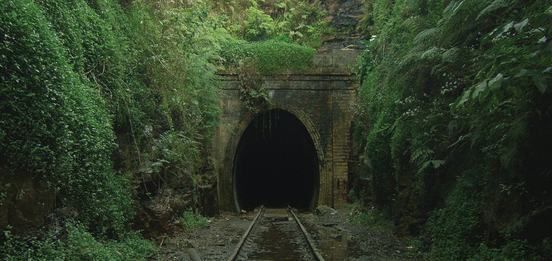
After viewing, either write up a response, or discuss in a group, the following prompts:
| 1. | What do you notice about the way the footage in Phantom Ride changes? |
| 2. | What kinds of places, landscapes, or environments do you see in the piece? |
| 3. | How does Phantom Ride make you feel while watching it? |
| 4. | Have you ever had an experience—on a train, bus, or other journey—that felt similar to the shifting, layered imagery in the work? |
| 5. | Do you think this work is more about “place” or about “time”? Why? |
| 6. | Did this work remind you of other art works or media art works? |
| 7. | How does Phantom Ride challenge your usual sense of time and space? |
| 8. | What role does sound (or the absence of it) play in shaping your experience? |
Artist intent & inspiration
Phantom Ride comes out of my long‑held fascination with the convergence of trains, the birth of cinema and modern ideas and representations of time. I’ve presented it as a two‑sided video; the forward‑facing journey on one side and the rear looking journey on the reverse. The screen becomes a meniscus of the present, separating the past and the future.
Consider Crooks' quote above, and watch the video below where he expands more on his practice and the work.
In the video Crooks describes the screen as a “meniscus of the present.” In anatomy, meniscus is the thin cartilage between joints, and in physics, it is the curved upper surface of a liquid in a tube.
Crooks has also mentioned his interest in trains, and the title of the work 'Phantom Ride' actually comes from a type of filmmaking that became popular not long after the invention of the film camera (but before narrative films exploded in popularity).
In the early 1800s, two major inventions — the railroad and photography — transformed how people experienced and understood the world. Rail travel, beginning in England in 1830, offered passengers a continuous view of landscapes rushing past, a new sensation of the world in motion. After the invention of the moving-film camera around 1895, some early filmmakers sat at the front of trains, and filmed a forward-facing perspective that took in the train tracks and the landscape left and / or right of the tracks.
Watch an example The Haverstraw Tunnel (1897), below.
| 1. | Crooks described the screen as a “meniscus of the present.” What do you think he means by this? |
| 2. | Crooks manipulates digital footage “as though it were a physical material.” How does Crooks transport viewers from one location to another? And how does this add ‘physicality’ to the work? |
| 3. | Having watched Phantom Ride, and seen an example from the late 1800s, describe the ways his work connects to the history of cinema and trains? |
| 4. | What is present in Crooks’ work, that isn’t present in The Haverstraw Tunnel example? |
| 5. | Do you think Phantom Ride could be understood without knowing anything about the history of trains and cinema? Why or why not? |
| 6. | If you were to create your own “phantom ride,” what journey would you choose and how would you present it? |
Exploring four dimensions
Crooks has spoken of his interest in “representations of time”, and that when creating Phantom Ride, he aimed to give viewers “a taste for what it might be like to experience a four-dimensional experience.”
But what exactly are these “dimensions,” and how can we represent them in art?
Illustration task
On a piece of paper, draw an example of:
- A one-dimensional shape (a line)
- A two-dimensional shape (a square or circle)
- A three-dimensional shape (a cube or sphere)
Now, consider that the fourth dimension, is time. Think about your three-dimensional drawing moving through time, and illustrate what that might look like. It could be as simple as adding a line that represents time, upon which your 3D object would move along.
In Phantom Ride, viewers are transported through ‘doorways’ from one section of railway tracks to another. These ‘doors’ act like portals; moving us from one location to another, or from one point in time to another. This is one interpretation of how Crooks explores all four dimensions in Phantom Ride, but you might have a different interpretation entirely.
A history of capturing time
Early photographers explored how to record not just a single moment, but a sequence of movement.
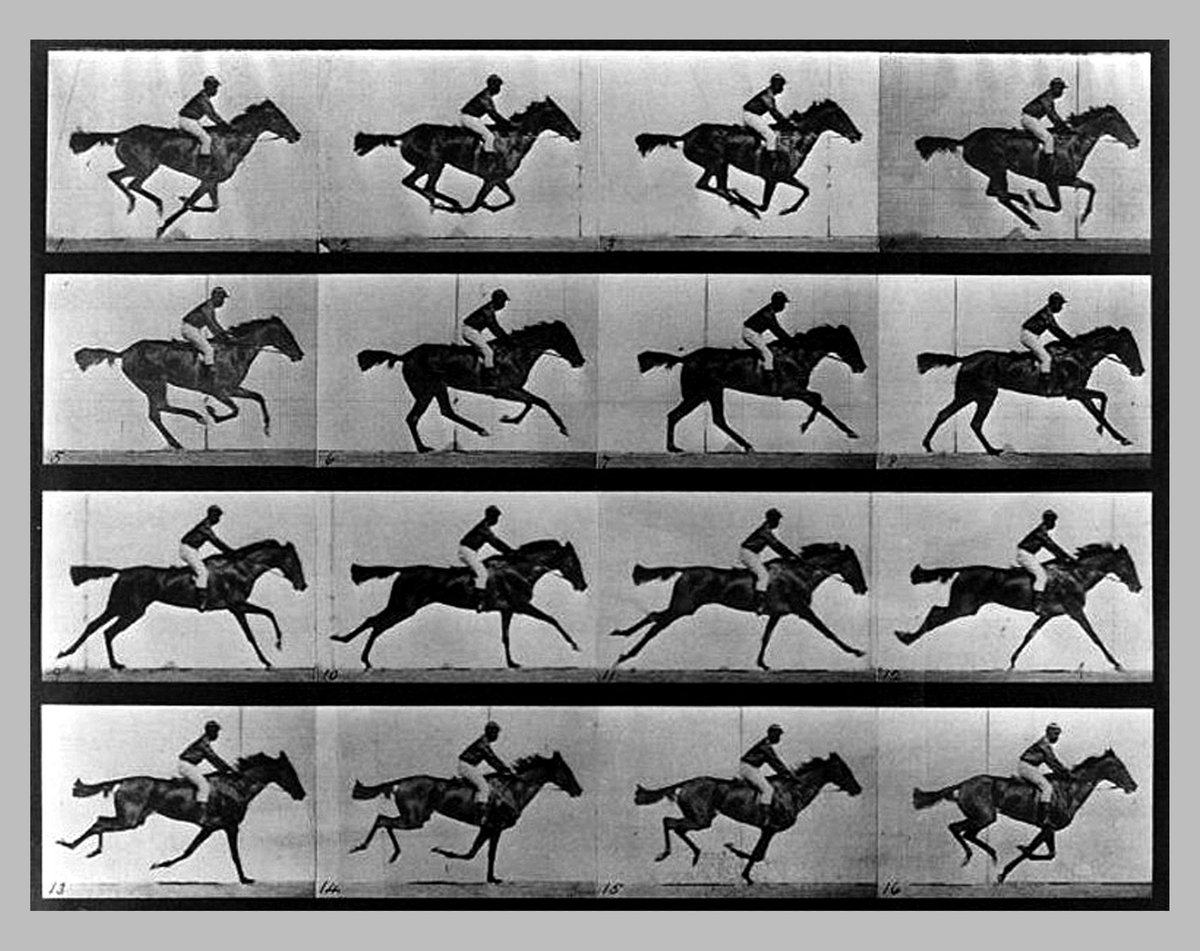
Eadweard Muybridge, whose time-splitting photographs are incredibly famous, captured movement in a series of still frames, which, when viewed in sequence, revealed the stages of an action too quick for the naked eye.
This was achieved by increasing camera shutter speeds and slowing time to a fraction of a second. Using multiple cameras triggered by trip wires, he captured a galloping horse in sequential images.
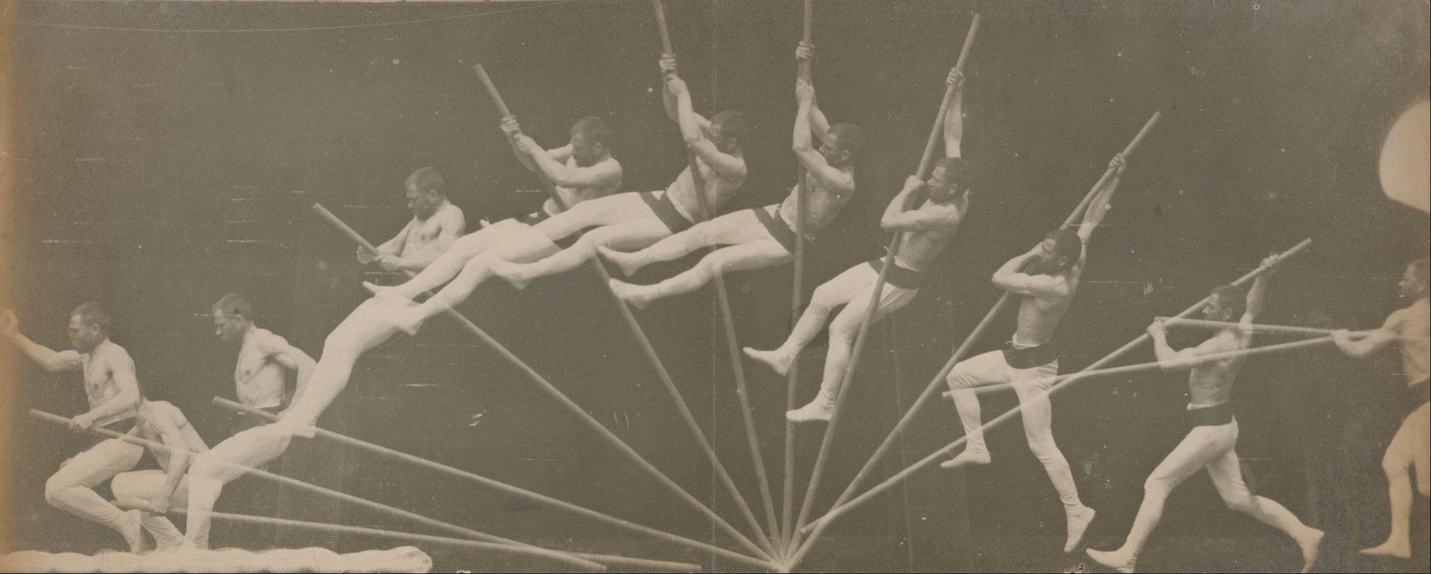
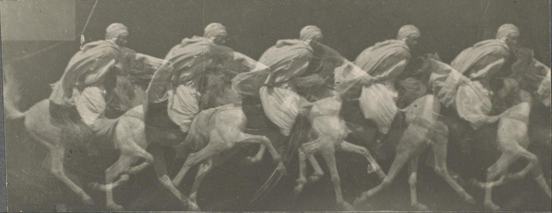
French scientist Étienne-Jules Marey's technique layered multiple exposures onto one photographic plate, allowing viewers to see an entire action — like a pole vault — unfold in a single image. This technique was called 'chronophotographic', and it captured kinetic motion through multiple exposures; all in one photo.
Marey and in particular Muybridge's works, are often credited (at least partially), as helping lead to the invention of moving-image film cameras.
If you happen to visit The Story the Moving Image, you will find reproductions of these images in a section called 'Splitting Time'. If you can't make it to ACMI, you'll find more information and images from section here.
If you're interested, the Smithsonian has a great article on Muybridge and his famous photographs here, and the San Francisco Museum of Modern Art have a great video essay here.
| 1. | What similarities can you see between ‘Phantom Ride’, and Marey or Muybridge’s photographs? |
| 2. | How does ‘Phantom Ride’ also play or experiment with time? |
| 3. | How do you think Marey and Muybridge’s experiments with photography and shutter speeds, helped lead humanity to the invention of cinema and moving-film cameras? |
| 4. | In your own words, describe the effect of the ‘doorways’ in Phantom Ride – does it feel to you like you are jumping through time, space (or both?) Explain. |
| 5. | Marey and Muybridge used photography and other technology and materials to achieve their works. Describe what equipment and technologies you think Crooks used to create Phantom Ride – this might include digital and analogue tools used to both capture and edit his work |
Inquiry based learning: Time
This is an additional resource that explores the concept of time in various ways. It might prove useful for student artists interesting into delving further into themes, concepts and the science of time, as a potential theme or influence on an artwork for Visual or Media Arts.
Droste effect and mise en abyme
Phantom Ride also connects with a technique called the 'droste effect' or what in Western art is often called 'mise en abyme'.
In the droste effect, an image recurs within itself, over and over, producing a loop that appears as if it could go on forever. Mise en abyme is similar, but pre-dates the droste effect which was coined after the image of a nurse carrying a tin of Droste cacao powder, which features the exact same image (and so on).
Watch the handy explainer below:
| 1. | In what ways does Phantom Ride share characteristics of the droste effect? |
| 2. | How does Phantom Ride differ from the droste effect or mise en abyme? |
Production process
Watch a section of the earlier video, but this time from the time mark 2:03 - slow down or pause the footage to get a better sense of the rig Crooks used to film the footage for Phantom Ride. The creation of the rig / dolly would have been part of the pre-production process, with the filming part of the production process.
You will have noticed a few important pieces of equipment in that section of film:
Dolly: a platform or frame with wheels that moves along a track. Crooks' dolly was designed to run along railway tracks in Victoria, Australia, and Crooks filmed exclusively on railway tracks that have the same gauge (the same width).
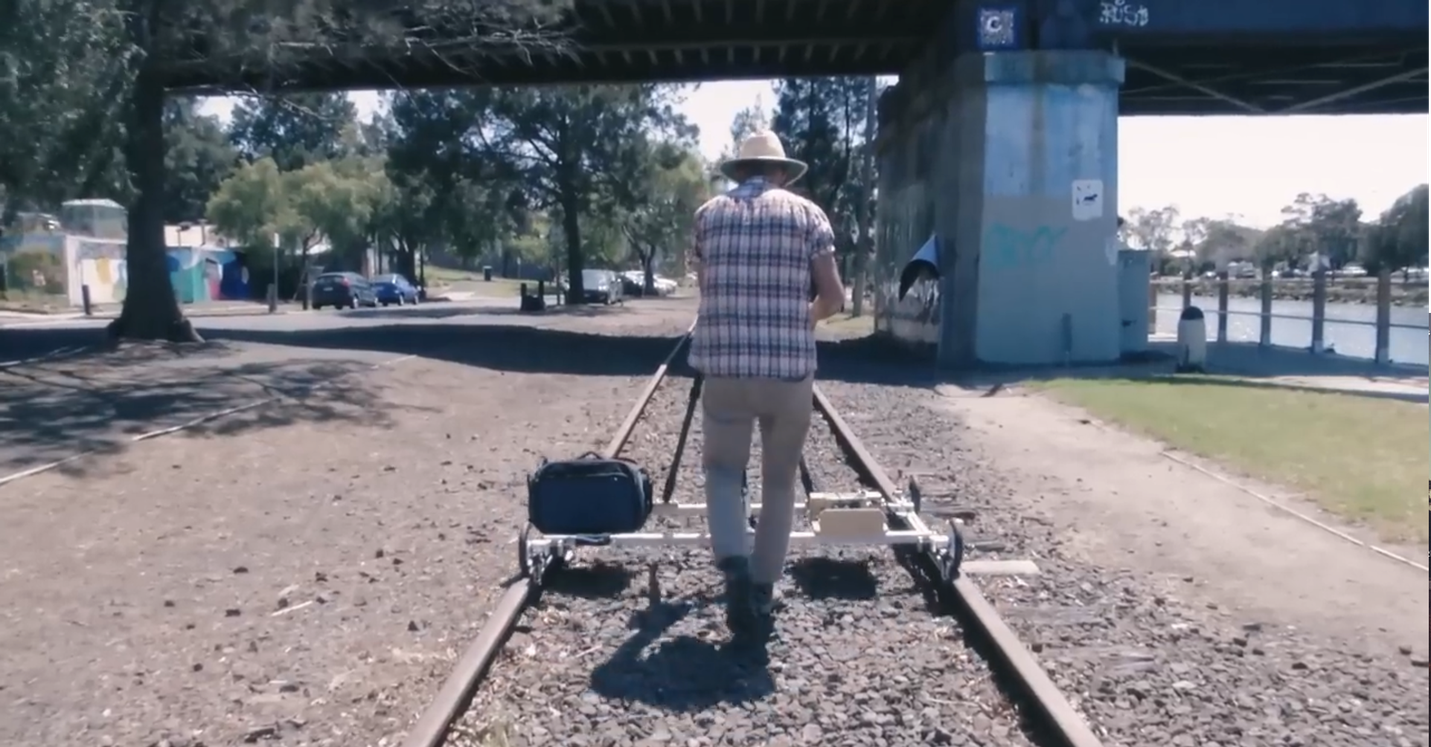
Tripod: cameras often need tripods, but Crooks would have had to ensure the tripod was always at the same height, and set in the right position atop the dolly, in order to ensure consistency with his footage, that was shot in many different locations. If the height or positioning was different, then the horizon line would have differed from shot to shot.
Camera: Similar to the tripod needing to stay the same between filming locations, the camera would also have to be level for each shot, with the same lens width for every piece of footage.
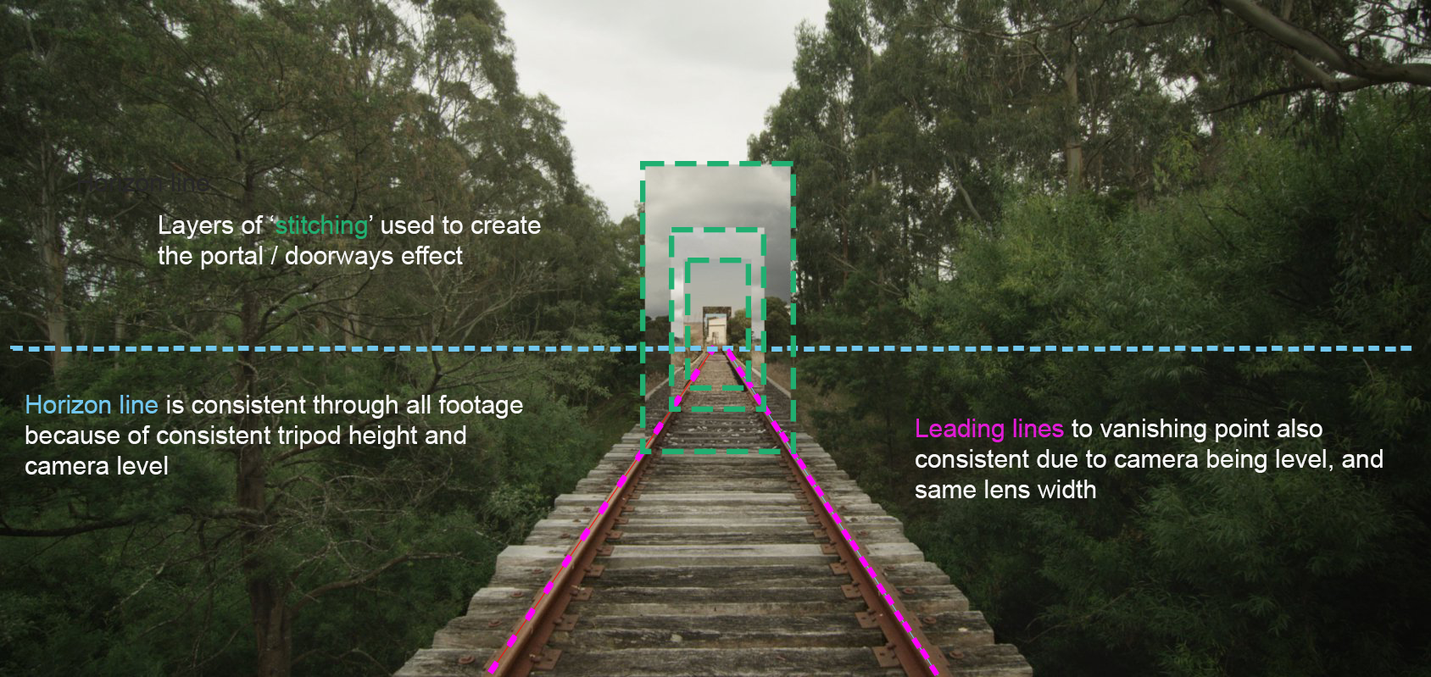
The camera settings are instrumental to maintaining a consistent horizon line, and also in maintaining the leading lines of the tracks. Meaning, shot properly, the railway tracks from location to location line up perfectly, and maintain their angle to the 'vanishing' point (where the leading lines meet the horizon line).
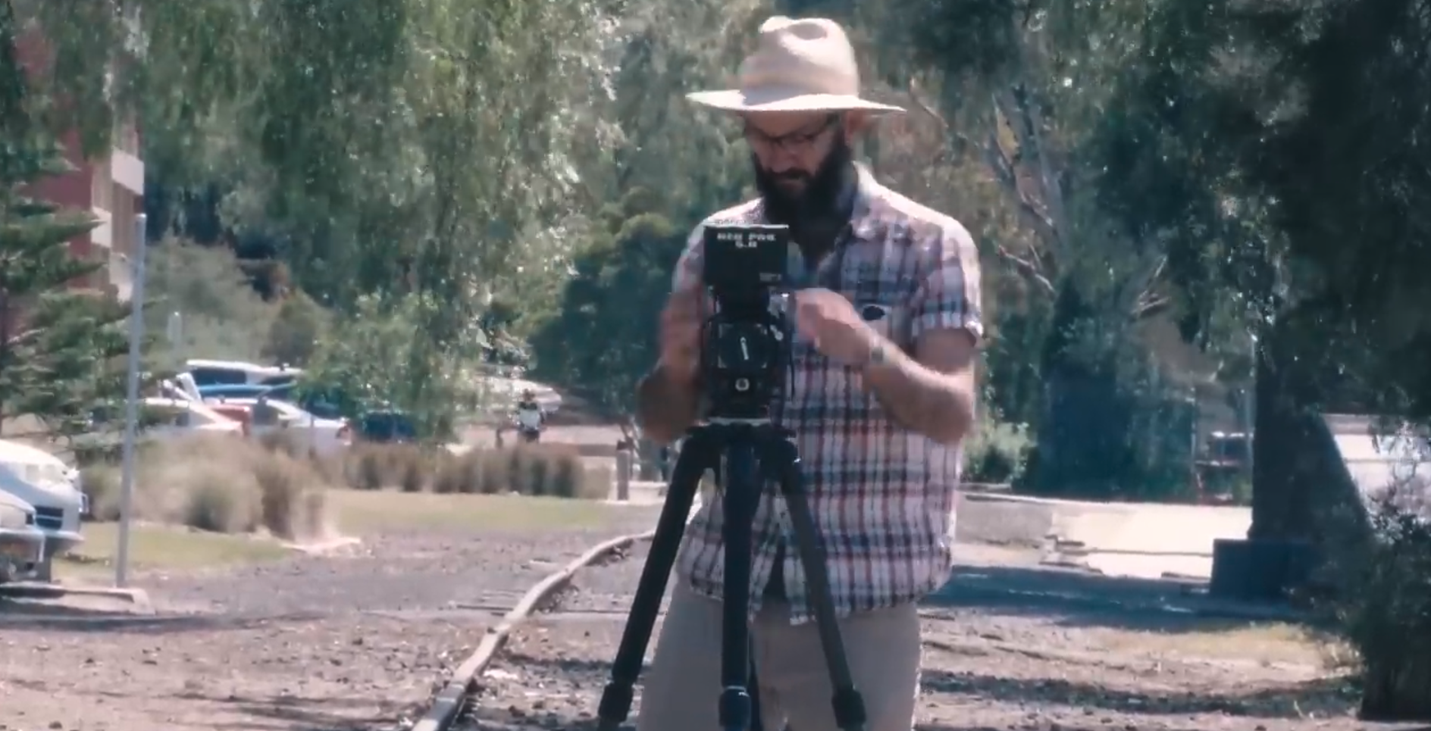
The horizon and leading lines are integral to the artist being able to 'stitch' together the different pieces of footage into the one frame.
If any pieces of footage were shot with a slight angle on the camera, or using different lens width or tripod heights, then the stitching effect would not have been possible.
Further variables Crooks would have had to control include:
The dolly speed: the dolly needed to be moving at the same speed at each location
Slate or time coding between cameras: remember, Phantom Ride features two cameras and views, one looking forward, and one backward. Crooks would have had to ensure he could sync the two channels when editing. Usually on film sets a slate (also known as a clapper loader) would be used to sync footage with sound, with Phantom Ride, Crooks would have had to find a way to ensure he could match and syncronise the two different channels of footage later.
Production and perspective
We've used a few important terms as part of the production process, and these are terms you have already come across in an Art or Media class.
Horizon line: due to the earth's curvature, the horizon is always the same distance away from us (although this can change if we are atop a building or similar!) Even with mountains in the distance, or trees etc blocking our view of the horizon, as is the case with much of the footage in Phantom Ride, we can still usually infer where the horizon, or horizon line is.
Leading lines: this is a composition term, and it's where an artist, photographer, or cinematographer identifies and captures 'lines' in the frame that direct the viewer's eyes in a certain direction ,or towards something.
Vanishing point: you may have experimented with vanishing points before, it's where straight parallel lines lead into the distance and converge.
In the below i this is a composition term, and it's where an artist, photographer, or cinematographer identifies and captures 'lines' in the frame that direct the viewer's eyes in a certain direction or towards something.
| 1. | Describe the connection between horizon line, leading lines, and vanishing point in Phantom Ride |
| 2. | Summarise the steps Crooks would have taken to ensure the horizon line and leading lines were consistent, and describe why this was important to the work |
Post-production
Though Phantom Ride is an artwork, being a video or digital artwork, it followed a production process of a Media creation, so pre-production, production, and post-production.
Pre-production would have involved conceptualising the work, creating the dolly and rig, location scouting, and less exciting things such as seeking permission to film at certain locations.
We’ve covered the production process, the actual filming, as well as the many things Crooks would have had to consider to ensure consistency of footage, so the post-production part went smoothly.
Crooks would have used editing software to not just collate the footage, but to create the mesmerising effect where the audience travels seamlessly from location to location. It is not an easy effect to achieve, but not impossible either – in fact, this effect can be achieved using accessible editing software including Premiere Pro (free to Victorian Schools) Final Cut Pro (paid Apple software) or the free and quite fantastic editing software Da Vinci Resolve.
Rather than going into each possible editing program, let's instead break down the techniques and tools that Crooks would have used.
If you’ve studied Art or Media before, you may have already identified some of the techniques or tools used.
There are two parts to achieving the effect seen in Phantom Ride.
The ‘equation’ for the first part is layering + cropping = picture in picture.
We layer one piece of footage over another, and crop in the overlaid layer (or layers in Phantom Ride’s case) so they appear inside the original layer. This picture in picture effect of course echoes what we learnt earlier about the droste effect and mise en abyme.
Key framing
The other more complex tool and technique used is 'key framing'.
Key framing is used in animation, motion graphics, and sometimes editing. It’s where editors and animators define the start and end points of movement.
In Phantom Ride, the ‘doors’ or boxes that frame the next piece of footage (and beyond) moving towards the viewer have had key frames added. Essentially, the four cropping points around the next location / piece of footage, extend out towards the bottom and top of the frame, until the screen and the viewer, are fully enveloped by that footage.
Practical excercises
Here are two activities you can try out, these can either be photographs, or film footage. You will need either an image editing program (like Photoshop) for photography or editing software if filming (Premiere, Final Cut, Da Vinci Resolve, even iMovie or CapCut could work for this).
Excercise #1
Using a tripod (or similar stabilisation device), film or photograph the same location at different times of day.
Take your imagery, and using your software, layer and crop the two images or pieces of footage together. You could split the screen vertically or horizontally, do a box or ‘door’ in the middle of the frame similar to Phantom Ride.
Excercise #2
Using a tripod (or similar stabilisation device), film or photograph two (or more) different locations, ensuring your tripod is at the same height, and your camera is level. With each location, try and find something that connects how you capture the locations. Horizon line is a good one, leadings lines (like a school corridor inside, or a straight path oustide) is another. Even just a sense of symmetry can be effective.
Take your imagery, and layer and crop your imagery together in a way you think if aesthetically pleasing. Boxes in the middle of the frame like Phantom Ride is good, but so could splitting or dividing the frame and your imagery in other ways.
Excercise #3: Key framing or adding movement
As mentioned earlier, key framing is the more complex element required to make Phantom Ride work as Crooks intended.
It’s not impossible though, and you might be curious and interested in having a go yourself.
Film footage: Identify the editing software you have access to or are using, and find yourself a key framing tutorial.
Key framing is possible with CapCut, FInal Cut Pro, Premiere Pro, Da Vinci Resolve
Photography: If using photographs or still images, Adobe After Affects has a key framing tools.
A free alternative is Canva, which has some preset elements you could experiment with in order to achieve a similar effect.
Free resource
Teachers, if you have enjoyed this resource with your students, ACMI Education have a limited supply of booklets produced for the release of Phantom Ride as an Ian Potter Moving Image Commission, written by Curator Emma McRea.
It contains 11 pages, 1 folded sheet with 6 panels, and is A4 sized.
If you are in Australia, and would like to be mailed a copy, please contact us at education@acmi.net.au with 'Daniel Crooks Phantom Ride publication request' as the subject line, and be sure to include your name, your school and school address (no home or personal addresses please).