Storyboards
Recommended for Year levels: 4-10
Learning areas: Media, Media Arts, Visual Arts
Capabilities: Critical and creative thinking
A storyboard is a shot-by-shot visual plan that shows what a film will look like before the film is shot.
The storyboard acts as a visual guide to the team shooting the film.
Here you’ll learn about what storyboards are used for, why they’re important, and how to create them.
You can create storyboards in a variety of ways. We recommend starting by hand if you're new to storyboard, and then move on to using a free digital storyboarding tool called Storyboarder.
1. Storyboards by hand
Storyboards help filmmaking teams visualise a film and how to tell the film’s story through images. In a film, the audience follows a story not just through character's dialogue, but also through their actions. Even objects and settings help tell a story.
You can make decisions about how things will look by creating a storyboard. Each panel in a storyboard represents a camera shot and therefore what the camera will see and show. You do not have to recreate every frame of a film in a storyboard; that would take forever!
The task
Create a short storyboard. Before that though you should familiarise yourself with all the different shot types, so follow the link below and read through.
You can also complete one or all of the activities at the bottom of the shot types page before starting your storyboard task.
What you’ll need
- a script
- a shot list
Don't have one? Don't worry.We've made a short one page script called The Deal, as well as a shot list for that script:
Step 1: Script and template
Read the script and shot list provided, then pick out eight key shots from the shot list.
These shots might be the ones you think are most important or the ones that stand out to you. This might be because you can visualise them easily, or you think what’s being shown in the shot is particularly important to the story.
You’ll use these shots to create a short storyboard. Short just means not every shot in the script will be illustrated.
Aim for variety in the shots you pick, for example, a combination of close-ups, long shots and more. You don’t want your storyboard to be full of shots that are exactly the same.
Download and print the storyboard template below.
Before you start illustrating, read 'Notes on composition' below.
Notes on composition
Composition refers to how things such as setting, characters and objects are shown or placed in the camera frame. When you compose a shot in a storyboard, you are deciding what the camera should show the audience, and where everything will be placed within the shots.
As you plan your storyboard panels, think carefully about the shot type you're using, what you need to show in that shot, and where you want to position everything and everyone.
Need to brush up on your shot types? Take a look here.
Working on your masterpiece?
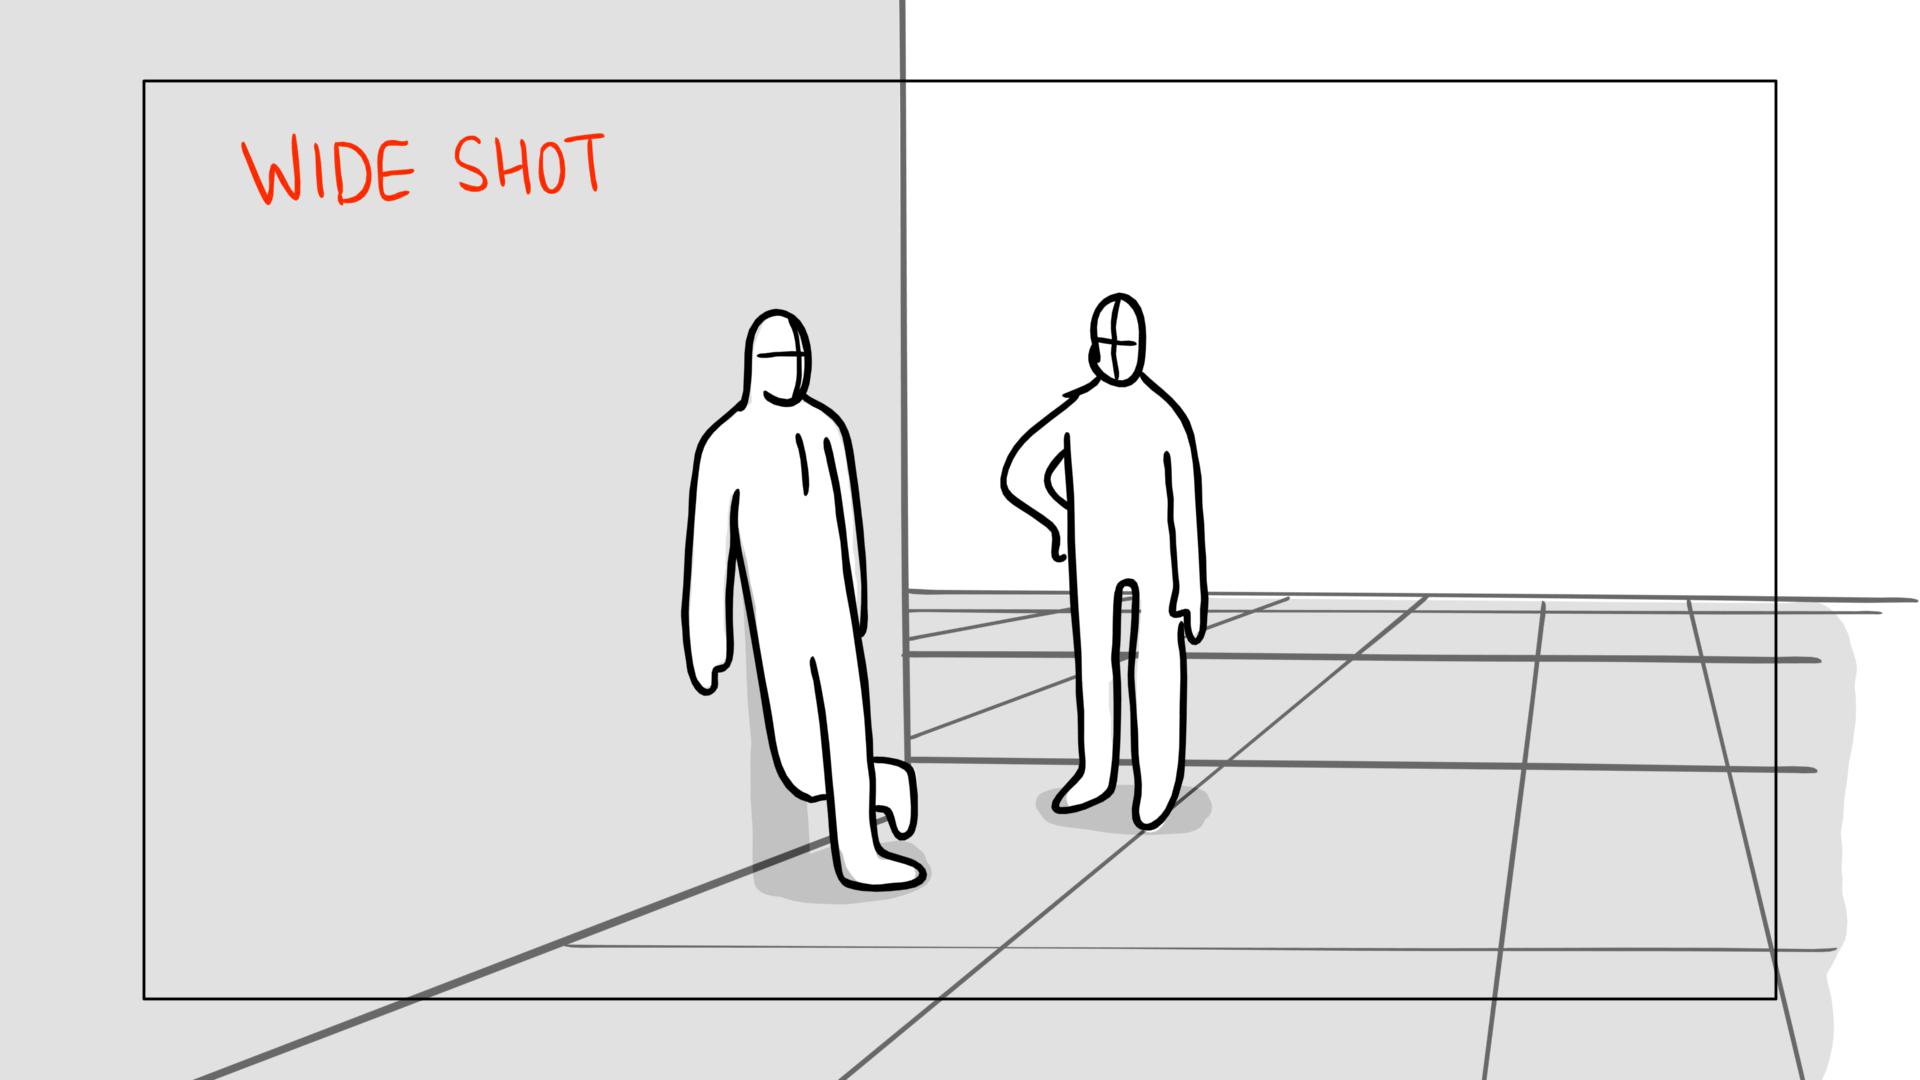
Your storyboards don’t have to be works of art. They just need to show the shot type, and what you want in the shot. In fact, they can be simple black and white sketches with stick figure characters.
Look at the examples below. They're simple, but good enough to get across a sense of what's happening, the layout of the setting, and the body language of the characters.
Another great way of seeing what storyboards are all about is to search for storyboards online from a film you really like, You could take note of the shot types used and the how the storyboard artist has composited their panels.


Step 2: Start illustrating your storyboard panels.
Before you draw your panels, fill out the notes in the section below each below panel. This will include any dialogue that is being spoken in the shot, a short description of the action that is occurring in the panel, and also the shot type you're using. Having this information in front of you as you sketch your panels make it's clear what you need to include.
Step 3: Get some feedback!
Show your storyboard to a friend, teacher or family member. Can they work out what's happening in each frame? Don't worry too much if not, but think about if there's any way you'd improve next time.
Congratulations! You've created your basic storyboard.
In the next module, we explore digital storyboards. Continue on to develop your storyboard, or head back to Film It to explore other aspects of filmmaking.
2. Digital storyboards
In a film, the audience follow the story not just through the dialogue and action of characters, but also how characters, objects, and setting are seen by the camera. By creating storyboards, a filmmaking team can plan out how and what the audience will see in each shot of the film.
So when making a storyboard, we think about what is being shown, and the best or most interesting way of showing it. You might also choose a certain type of shot or composite your shot because you think it will look good, and there’s nothing wrong with that. However, the focus should always be on telling the story and conveying what's happening in the best possible way.
To create a storyboard you'll need a script and shot-list which will impact what the storyboard artist creates, but it's up to them to bring the shots and story to life.
The task
Create a long storyboard for the short script The Deal using Storyboarder. Your storyboard should consider different camera shots, camera angles and character movement through the use of arrows.
What you’ll need
- a script and a shot list. Use the script provided above for The Deal, and the advanced shot list below.
- digital storyboarding tool Storyboarder.
New to Storyboarder? Check out the instructional video above.
To download the software, you’ll need an email address to and approximately 70mb of space on your computer.
Step 1: Print the storyboard template
We’re going to make a long storyboard, meaning you’ll illustrate a panel for each shot on the shot list. Luckily it's quite a short script we're using.
Animating using a computer mouse can be difficult, so unless you have a digital drawing pad, use the storyboard template option to print out storyboard sheets. Later you can import these back into Storyboarder and some of its tools to add more detail.
Open Storyboarder and start a new project. When you're asked about aspect ratio, select 16:9. Aspect ratio refers to the dimension or shape of the frame.
Once you're in, find the 'print a storyboard worksheet' option. Decide how many panels per page you’d like to print. We suggest no more than six per page.

Tip: Save time by taking photos.
Does your production team already have a location in mind, or a location that is quite close to what you’re after for a particular scene or shot? You can take photos of the location and import them into Storyboarder as well.
A quick note on shots, angles, and composition
Composition refers to how things such as setting, characters and objects are shown or placed in the frame. So when you compose a shot in a storyboard, you are deciding on what the camera will show the audience, and where everything is placed within the shot. As you plan your storyboard panels, think carefully about the shot type you’re drawing and think about what you need to show in that shot and where you want to position everything.
Need a refresher on camera shots? Head to our shot types page.
You’ll notice in the shot list provided there is a column about camera angles. To learn more about camera angles follow the link below. There you can read up on different camera angles, and complete an activity on their use.
Step 2: Start illustrating your storyboard panels
Pay close attention to the shot type listed on your shot list, as well as setting, characters, objects and character movement you need to show in each shot. This information should be in the 'action' column of the shot list you're using, but don't forget any lines on the 'dialogue' column might affect what you draw in your panels also. For example, your character's mouth, expression, body movements and body language might be affected by what they're saying.
Arrows for character movement
Arrows are helpful to put into your storyboard panels. Start using them in your storyboards to show character movement.
Take a look at the two pictures below: without an arrow, we might not be able to tell what that character is doing.
You can also use arrows within your storyboard panels to show when a character is turning their head, lifting their arm...whatever really. What if an object is meant to fall off a table in your shot? Yep you guessed it... use an arrow. That's not to say you need an arrow for every movement in a storyboard, just the ones you think are important.


Step 3: Import your storyboards back into Storyboarder.
You can do this by taking a photo of each storyboard sheet on a phone or iPad, or by scanning your storyboards. Follow Storyboarder instructions to import your storyboard.
Once imported, try out some of the Storyboarder tools. There are a range of pencils, pens, textas and erasers. You can also adjust brush size, zoom in or out on your panels, move the image inside the panels, and more.
Step 4: Adding detail
Once your panels are in order, start adding detail for each shot on the right hand side.
You’ll notice there’s room for dialogue, action and notes. Add in all the important information from the script here. You don’t have to copy word for word what’s in the script, just an shortened version of the key information, similar to the description of action in a shot-list (in fact it can be the same description if you like).


Step 5: Export
When you're happy with your project, you can export as a PDF file so you and your crew can use when it comes time to film. The dialogue and action you've written in will appear on your storyboards when exported too.
Congratulations, you've created your digital storyboard.
Try the next module to find out how to animate your storyboard, or head back to Film It to explore other aspects of filmmaking.
3. Animate your storyboard
Now you have a solid understanding of storyboards, you can learn more about how to draw more effective storyboards, and how to create an animatic using Storyboarder.
An animatic is basically an animated storyboard. We'll import the shots we've drawn (or created digitally) and export them as a GIF that plays like a film.
Check out this example from Toy Story:
Did you notice it didn't have all the detail of the film? That's because storyboards show every shot, but not every frame.
It does, however, give the viewer a pretty good idea what your scene will look like.
The task
Create a storyboard that considers shot types, camera angles, composition; as well as arrows for character and camera movement. Once done, you'll create an animatic.
What you’ll need
- a script and a shot list. Use those provided for The Deal.
- digital storyboarding tool Storyboarder.
New to Storyboarder?
Start here on YouTube to get your grounding. For some more advanced tips, you can also check out this video.
Step 1: Import your storyboard into Storyboarder.
You can use one you created in an earlier module. Scanned illustrations, a digital storyboard, or even photographs would work! You'll be able to edit them a little in Storyboarder.
Step 2: Add movement arrows
We use arrows in storyboards to show:
- character movement (when the arrow is inside the panel) or
- camera movement (keep these arrows on or close to the edge of the panel).
The following images show character movements. We'll use an outline arrow for this purpose. What movements are the arrows showing?

We can also use arrows to show camera movement.
Forgotten your tilts and pans? Revise camera movement here.
Here are two examples of camera movement indicated with filled-in arrows.


Step 3: Complete your storyboard
Make sure you’ve completed your storyboard as best you can. This means that all your shots are shown by a panel, you’ve added arrows where you need them, and all your boards are in order in your timeline.
Step 4: Add dialogue & description
Go through your storyboard and include all the relevant information on the right hand side.
Anything you write in the dialogue box for each shot will appear when you export as an animatic.
Step 5: Add timing
Add timing to each panel in your storyboard.
How long will each shot go for in the film?
Imagine the action taking place in each panel, how long it will take, and then add time to your panels.
Note though that when you write in the dialogue box, Storyboarder estimates how long that panel should hold based on how much dialogue you’ve written. You can change the timing if you don't like the automatic estimation.
When entering in timing manually, Storyboarder asks for milliseconds, not seconds. So 1000 milliseconds = 1 second.

Step 6: Play it back
Play it back, make small changes if necessary.
Once you’re done, playback your storyboard and if you’re happy with it, export as a GIF.
Right-click the file Storyboarder GIF below and open in a new browser window to see an example of how the GIFs come out. Show a friend or someone in your team, does the timing feel right? Could you add or change anything to improve it?

Congratulations! That's the end of our storyboarding module.
Head back to Film It and explore more filmmaking roles.