Visual effects
Suitable for year levels: 3-10
Learning areas: Drama, English, Media & Media Arts, Technologies
Capabilities: Creative and critical thinking
So what are visual effects anyway?
Visual effects (or VFX) is the term used to describe the different ways moving-images are manipulated to create illusions. Visual effects are created in the post-production stage of a film but often require footage captured in the production stage to work.
There are lots of different types of VFX, and as you’ll find out, some are simple to create.
The one thing that effective creation of VFX have in common though is planning. The better your preparation, the better the outcome.
In this module, you’ll learn about three simple visual effects and some different ways to incorporate them into your film.
1. Jump cuts: disappearing, transforming, and dissolving
In a traditional sense, a jump cut is a transition used by filmmakers to show a time jump or a change of location during a film. However, when used creatively within a scene, a jump cut can be used to create an exciting visual effect.
In the following exercises you will find out how jump cuts can be used to create three different magical effects in your films.
What you'll need:
- Video camera (eg handicam, smartphone, tablet or DSLR)
- Tripod (don't have one? Get creative with these improvised versions)
- Video editing software (see our recommendations in the Editing module)
Some things to think about:
- Composition and lighting: Everything within your camera frame (except the things you want to move or disappear) need to stay consistent throughout the scene
- Spatial awareness: Depending on your desired outcome, you need to be aware of the actor's position in the scene
- Signifying event: Having an event to signal where to cut helps get your timing right. A loud sound works well
- Don’t stop filming: The jump cut will be created using your editing software
- No one way: The ways in which you can use jump cuts are only limited by your imagination
Jump Cut 1: The Disappear
Let's get started. In our first jump cut activity, we're going to make an actor or object completely disappear!
Let's say you've found a magic kettle, and when you clap, it disappears.
| 1 | Set up your scene with a still camera (a tripod or homemade version is essential here) |
| 2 | In the first part of the scene, the kettle will be visible. Maybe your actors are standing around it, admiring it. |
| 3 | When the actor claps, everyone in the scene freezes. Do not stop filming. |
| 4 | Someone in the crew (not your actor) removes the kettle. |
| 5 | When the kettle and crew member are completely out of view, the director calls 'action!' The actors unfreeze and react to the disappearing kettle |
| 6 | Finish the scene and call 'cut' |
Of course, the kettle is only an example! You could try this with any object or actor. Having a clap, or another quick sound, at the moment of disappearing will help you get the timing right.
Now, let's turn this into a real disappearing act in your editing software.
| 1 | Import your footage to your editing software and bring your clip to the timeline |
| 2 | Use cut tool. Find the clap sound, and place a cut just after it. Then, find the moment that the director called 'action!' and place a cut just after that. |
| 3 | Remove the footage in between the two cuts |
| 4 | Join the before and after together to create the disappearing illusion |
| 5 | Review and see how it looks! You can use the 'undo' function as necessary to fix your timing |
| 6 | Get creative! Do you need sound effects or visual effects? Add them to your timeline and position them appropriately |
How did it go? I bet, if you really put your mind to it, you could make the kettle reappear using the same technique...
Time to put your new trick to work in your project!
Jump Cut: Instant Change
You can use jump to create the illusion that something or someone in the frame changes appearance in a split second.
For example, let’s say you're heading on a trip to Hawaii. You click your fingers and voila, you're wearing a Hawaiian shirt. Again, a signifying event (like a click or clap) will help you to get your cut exactly right in post-production.
You can also use a jump cut to change the appearance of an object, like transforming an empty pot into a pot with a plant in it.
It's important to be aware of the actor or the object’s position in the frame. It can totally ruin the illusion if the actor or the object changes position. Some strategies to help with this might be to mark your position on the floor with masking tape or chalk, or take a photo of the frame to mark positions within it so you can get back into the same position.
Now, follow the steps below to create your very own instant change.
| 1 | Set up your shot. Think carefully about what's in the frame (ie. is anything moving that you can't control, like cars or people walking by? Are there strong shadows? Is there background noise? Try to limit any elements that will ruin your illusion) |
| 2 | Position your actor or object, ready to begin recording |
| 3 | Begin recording and call 'action' |
| 4 | Act |
| 5 | Signifying event (clap, click etc) |
| 6 | Actors/other elements in the scene freeze. Make the change to the actor's clothes, object or whatever you choose. |
| 7 | Call 'action' again. Actors complete the scene |
| 8 | Call 'cut' and stop recording |
| 1 | Import your footage to your editing software |
| 2 | Bring your clip to the timeline |
| 3 | Use the appropriate tool for your editing software to cut just after the signifying event, and just before you continue acting. |
| 4 | Remove the footage in between the two cuts |
| 5 | Join the before and after together to create the illusion of change |
| 6 | If you're adding a sound effect, add it to your timeline. Position it just where your event happens. |
2. Jump cuts: teleportation
The jump cut requires attention to detail and allows us to create the illusion of instantly changing from one location to another.
This use of the jump cut here can be tricky, and pulling it off requires your actors to be in a similar position within the frame in both the first and second locations.
Unlike the change of clothes jump cut, you won't be able to mark your position on the ground, so your film crew will need to be really on the ball regarding the actor's position in the frame and distance from the camera.
Slight shifts in position won’t totally ruin this effect, after all, if popular sci-fi has taught us anything, it's that something always goes wrong with teleportation. It could also be fun to mix it up, maybe a purposeful change in position can add drama to your scene, for instance, you might land too close to a dangerous object or on the wrong side of a door. Maybe, if a group of people are teleporting your actors could arrive in a rearranged order, or maybe one won’t arrive at all!
| 1 | Compose your shot. Think carefully about what's in the frame. |
| 2 | Position your actor or object, ready to begin recording |
| 3 | Begin recording, and call 'action' |
| 4 | Act |
| 5 | Signifying event |
| 6 | Call 'cut' |
| 7 | Stop Recording. Cameraperson checks the position of the actor(s) within the frame |
| 8 | Change location |
| 9 | Compose your shot. Carefully match the actor's position in the frame (as discussed, a little shift isn’t the end of the world and a purposeful shift can add drama) |
| 10 | Begin recording and call 'action' |
| 11 | Continue acting out the scene |
| 12 | Call 'cut' and stop recording. |
| 1 | Import your footage to your video editor |
| 2 | Bring your clip from each location to the timeline |
| 3 | Use the appropriate tool for your editing software to cut just after the 'event' and just before you continue acting |
| 4 | Remove the footage after the cut in the first location and the footage before the cut in the second location |
| 5 | Join the before and after together to create the illusion of the teleportation |
It can be a good idea to add in a few seconds of the location your actors are leaving (or entering) to show they've just left it or have yet to arrive. Just record a little bit of the location without your actors to edit in where you need it.
The Dissolve
To add a little something extra to the teleportation jump cut, you can try the dissolve or 'a fading teleport'.
This can work at either, or both ends of the teleportation and can be really cool. You need to record about five or ten seconds of empty footage of the space you are teleporting from and/or to.
In the editing stage, place this after (for teleporting from) or before (for teleporting to) when you leave or arrive. Next, add a simple cross dissolve effect between the shot of the empty space and the space with actors in it. Make sure you get the order right.
3. Keying: magical worlds & floating heads
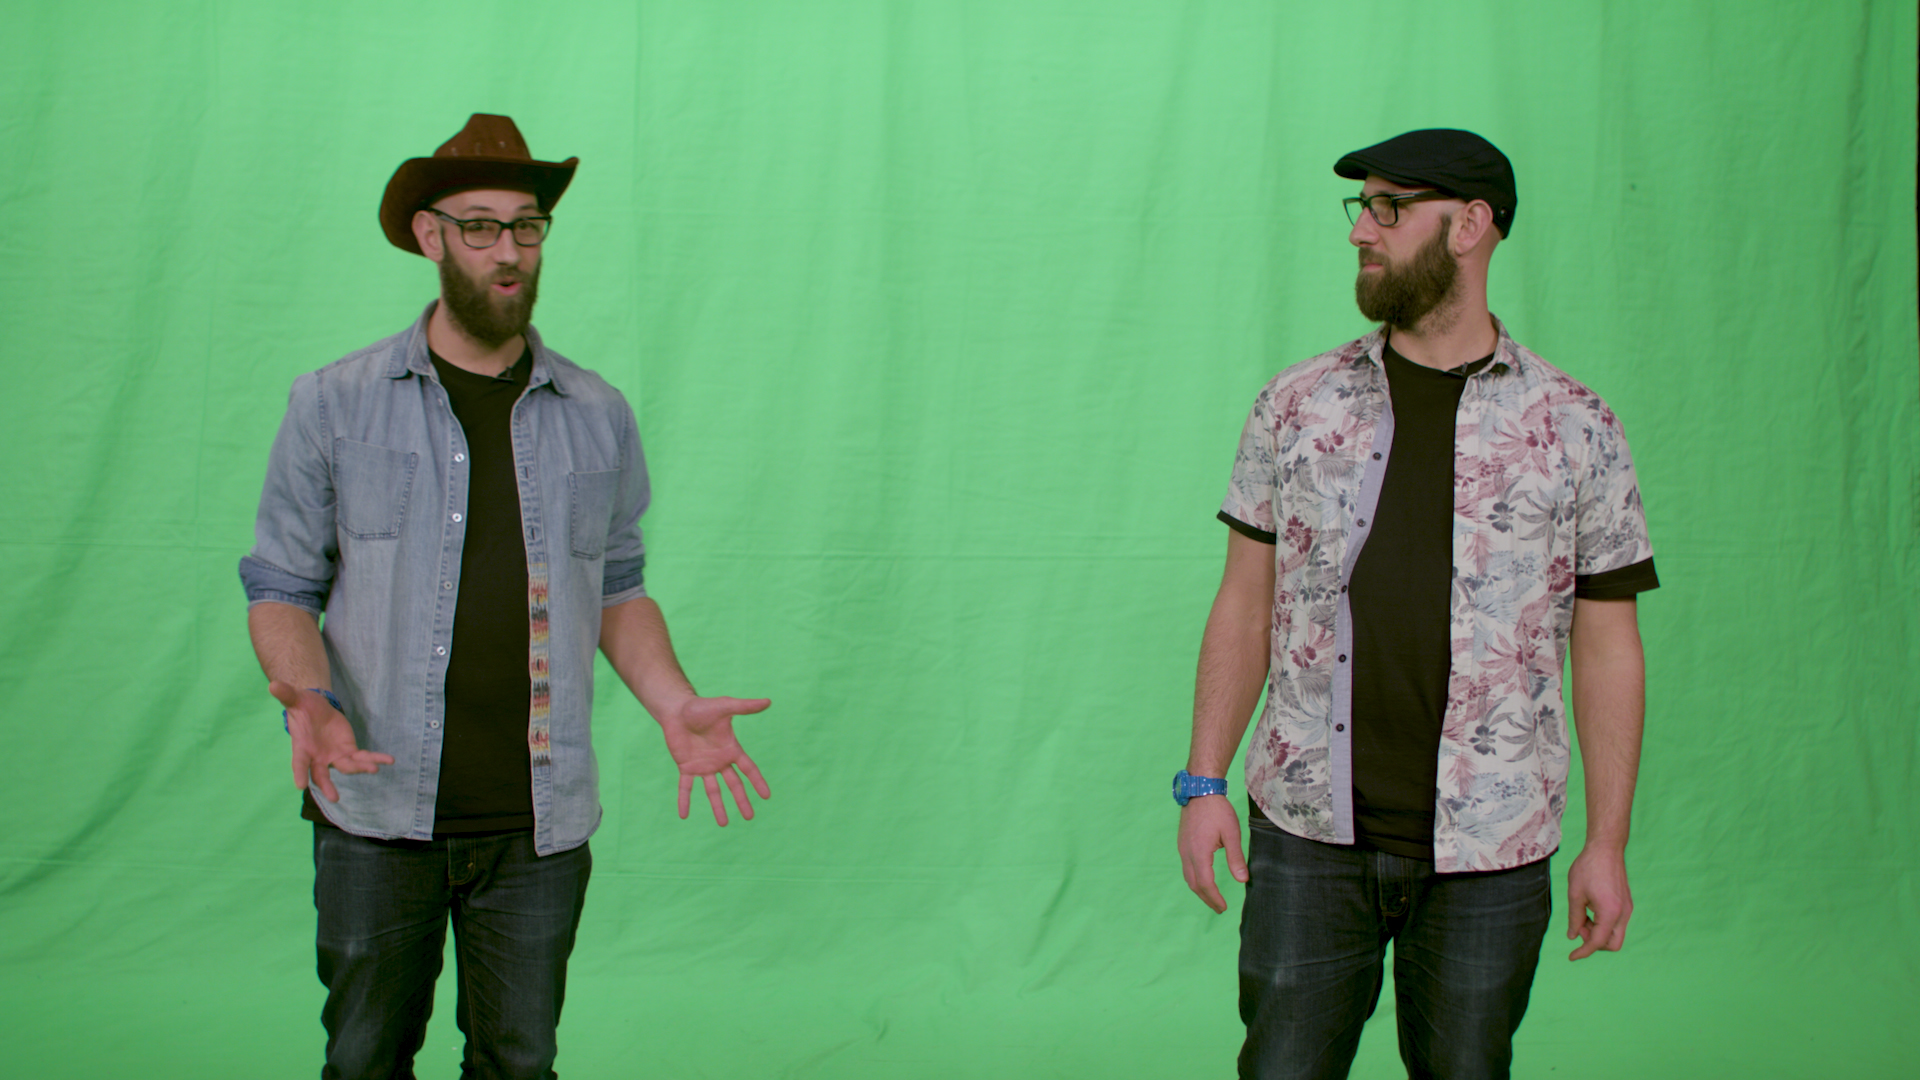
Keying, or chroma keying, is a simple visual effect that allows us to make parts of what's in our camera frame disappear or become transparent. Chroma keying is often used in conjunction with a green screen so some other background or footage can be layered into the scene.
The part of the video we remove is based on colour.
Today the colour used is almost always green, but in the past blue screens have also been used. So why do we use these colours? And are there are colours that can be used? You'll find out soon enough but first here is a list of what you will need to complete the activities in this lesson.
What you'll need:
- Video recording device
- Tripod or static stabilisation support
- Video editing software
- A chroma-key backdrop (green screen)
Some things to remember when keying:
- Composition: Your frame will need to stay consistent throughout the scene, making sure the green screen takes up the whole frame
- Lighting: It's best if your lighting stays consistent throughout the scene. This will make it easier to key out later
- Spatial awareness: Remember to stay on the green screen to get the best result
- Have fun: This is a creative and fun activity, let your imagination run wild
- Location location location: Be creative with your new location. Think of going somewhere that you wouldn’t normally be able to go to, like outer space or an erupting volcano.
Which colours key?
This simple activity will help you to understand which colours key well and why some colours are better for keying than others.
What you'll need
- A range of objects. Try to get as many different colours as you can.
- A stack of different coloured papers in a range of colours. Try to get red, blue, green, yellow, purple, and orange.
- A digital camera or cameras.
- Video editing software.
- A background image.
| 1 | Work in small groups, each group having a different coloured piece of paper. |
| 2 | Photograph as many objects (one at a time) on the coloured paper as you can. |
| 3 | Photograph your hands on the paper. |
| 4 | Import the photos to the video editor. |
| 5 | Bring each of your photos to the timeline. Stretch them out to three seconds. |
| 6 | Bring the background image to the timeline. Be sure to add it underneath your photos. Stretch it out so it underscores all of your photos. |
| 7 | Apply the keying effect to your photo. |
| 8 | Specify the keying colour to match the colour of the paper. Do this in the keying effect options, look for an eyedropper icon. |
| 9 | See which colours key best with the different objects and their hands. |
| 10 | Discuss with the class why you think different colours work well or not so well. |
Location change
This exercise will see your actors transported to a whole new world (cue Aladdin song) or location just like magic. Try to have a reason why your actors will be in this new setting, as it will seem strange if suddenly, the movie location changes to somewhere unusual. Depending on the size of green screen you have, you may only be able to film mid shots and closeups rather than long shots
Use Google Image Search to find a location that is wild and wonderful, somewhere that your actors wouldn’t be able to go, but that fits with the movie script.
Using the tools options of Google Image Search, set the usage rights to "Labelled for Reuse". This means you can use the image without infringing the image maker's copyright. You should also set the size to larger than 6MBs, this means your image won't pixelate when it's enlarged.
Find a space large enough to hang your keying fabric and set your camera up on a tripod in front of it. Make sure your whole frame is taken up by the green of the fabric. If there are any areas not covered they won't be keyed and it could look odd in your film.
| 1 | Compose your shot |
| 2 | Position your actor(s) to begin recording |
| 3 | Begin recording and call 'action' |
| 4 | Act |
| 5 | Call 'cut' and stop recording. |
| 1 | Import your footage and location image into your video editor |
| 2 | Bring your clip onto the timeline |
| 3 | Bring your location image onto the timeline, being careful to place it underneath your clip |
| 4 | Find your keying effect in your video editing program |
| 5 | Apply your keying effect to your clip (in most video editors, this is as simple as dragging the effect to the desired clip) |
Floating head
This exercise will allow you to create some fun and special monster or horror effects. By using the magic of the green screen and keying, not just to take you somewhere amazing, but to affect their own bodies in the movie. Your actors could lose an arm or a leg or even lose their heads. You will need some extra chroma key material to wrap around your limbs. We've demonstrated how you can achieve this effect in the video below.
Prepare
Use Google Image Search to find a location that fits with the movie script, remembering the tools options you used in exercise one.
Find a space large enough in your classroom to hang your keying fabric and set your camera up on a tripod in front of it, making sure your whole frame is taken up by the green of the fabric. If there are any areas not covered, then they won't be keyed and it could look funny in your movie.
Ensure your actor is wearing the keying clothes before the scene starts so that they don't lose their heads during the scene, or try combining this with a jump cut so that they do.
| 1 | Compose your frame |
| 2 | Wrap a part of yourself in your chroma key material |
| 3 | Position your actor to begin recording |
| 4 | Begin recording and call 'action' |
| 5 | Act |
| 6 | Call 'cut' and stop Recording |
| 1 | Import your footage and location image into your video editor |
| 2 | Bring your clip onto the timeline |
| 3 | Bring your location image onto the timeline, being careful to place it underneath your clip |
| 4 | Find your keying effect in your video editing program (sometimes a quick Google search can help with this) |
| 5 | Apply your keying effect to your clip (in most video editors, this is as simple as dragging the effect to the clip you want to apply it to) |
Extension: The Headless Wonder
This extension requires a little extra coordination and two actors to play the same character. One actor will be the 'body' and another actor will be the 'head' being carried by the body. The actor playing the body will need to wear a chroma key hood that covers their whole head, you can get thin ones that are see-through from the inside. The actor playing the head will need to wrap their entire body in chroma key cloth, or wear a full body chroma key outfit. During filming, the 'head' will follow and be held by the 'body'.
Well done you've mastered chroma keying. Next up, layering and masking.
4. Layering & masking
Layering is something that most video editors can achieve. It requires you to shoot a second reel of footage that you then can layer over the top of your original footage. This effect can be used to create really fun or really spooky effects in your video, or you can go really wild and create mind-bending double-exposure effects.
Masking can be used in conjunction with layering, can allow you to show or hide different parts of your footage, this enables you to make composite videos (two - or more - videos joined together to create one video).
In the following exercises, we will examine how we can use layering and masking in simple ways to add some cool VFX to your film.
What you'll need:
- Video recording device
- Tripod or static stabilisation support
- Video editing software
Some things to remember when layering or masking:
- Composition: Your frame should stay consistent throughout the scene. This will make it easier to add in your extra layer of footage
- Lighting: It will be best if your lighting stays consistent throughout the scene, this will make everything easier at the editing stage
- Space: When working with layering to create overlapping videos, you need to be aware of the position your actors take up in the frame to make sure the different layered videos don’t occupy the same space at the same time.
Effect: Screen overlay
This exercise will allow you to insert a clip into another clip to make it appear that your characters are watching something on a screen such as a TV, computer, tablet or phone. This can mean your characters can watch something or even interact with another character via a telecall/facetime call.
Tip: When filming for this effect, make sure your camera is on a tripod and that the screen you're replacing stays still (really still). If the screen you're replacing is moving, then the overlayed footage that you're inserting will stay static while the screen behind it will wobble which can break the illusion.
In the effects options, your video editor will have the ability to re-scale, transform and re-position clips in your video. Different video editors will have different methods of doing this. If you get stuck try looking in the program’s help menu or a quick Google search will help.
Make sure you have the in-set clip selected and then scale, transform, and position it to cover the screen in your main clip.
| 1 | Compose your shot |
| 2 | Position your actors to begin recording |
| 3 | Make sure the screen or device is visible in the frame |
| 4 | Begin recording and call action |
| 5 | Act |
| 6 | Call cut and stop recording. |
| 1 | Compose your shot |
| 2 | Position your actors to begin recording |
| 3 | Begin recording and call 'action' |
| 4 | Act |
| 5 | Call cut and stop recording |
| 1 | Import all footage and location image into your video editor |
| 2 | Bring your main scene onto the timeline |
| 3 | Bring in-set scene onto the timeline, being careful to place it above your clip. This will cover your main clip. Don’t worry: this was meant to happen. |
| 4 | In the effects options, your video editor will have the ability to re-scale, transform and re-position clips in your video. Different video editors will have different methods of doing this. If you get stuck try looking in the program’s help menu or a quick Google search will help. |
| 5 | Make sure you have the in-set clip selected and then scale, transform, and position it to cover the screen in your main clip. |
5. Keying and layering: clones
Have you ever wanted to be a twin? Well, this is your chance. This exercise will allow the same actor to be on screen as two different characters/people at the same time.
Using layering and masking to film your actor twice on in the same location before bringing them together into that location using your editing software. This is good to experiment with as it allows you to shoot on location out in the world.
Preparation
Before filming it’s really important to figure out if the ‘clones’ are going to interact with one another if they’re going to have a conversation, then you’ll need to time each half and be aware of timing when you’re filming each twin, or you could get someone to stand-in and read the lines while you film each twin to help get the timing right.
You will need to be aware of your actors’ position within the frame. A good way of keeping things simple when filming (and in editing) is to allocate one area for each twin and have your actor stay within those bounds.
| 1 | Compose your frame on location |
| 2 | Position your actor(s) to begin recording |
| 3 | Begin recording and call 'action' |
| 4 | Act |
| 5 | Call 'cut' and stop recording. |
| 6 | Be sure to make note of the position of your actors in this scene and not to overlap. |
| 1 | Compose your shot on location |
| 2 | Position your actor(s) to begin recording. Important: be sure not to ‘overlap’ your actor with your actor. |
| 3 | Begin recording and call 'action' |
| 4 | Act |
| 5 | Call 'cut' and stop recording. |
| 6 | Be sure to make note of the position of your actors in this scene and not to overlap. |
| 1 | Import your footage and location image into your video editor |
| 2 | Bring your clip of Twin A onto the timeline |
| 3 | Bring your clip of Twin B onto the timeline, placing it above Twin A |
| 4 | Find your masking tool in your video editing program (sometimes a quick Google search can help with this) |
| 5 | Apply a mask to the side of the Twin B’s frame that they aren’t on to block out the empty space. |
| 6 | A black mask on a clip will block out what it’s put over, revealing what is underneath on the timeline, in this case, your other clip. |
6. Keying and layering: the Ghost
Have you ever wondered if ghosts exist? Well, wonder no longer as you create your own ghostly scene in your movie! This effect is achieved by layering a scene shot on a green screen over the top of a scene shot normally on location. When layering, we reduce the opacity to create a ‘ghost’ effect. This effect will allow your actors or objects in your scene to interact with, or be affected by, a ghostly figure, played by another actor. This can be fun if your film is a ghost story or if you’re exploring ideas of the supernatural!
Preparation
This type of effect requires pre-planning before the shoot. In particular, you’ll need to plan out the movements and position of your actors and objects in both the main clip and the clip to be layered (the over clip). As your ghost will be filmed on a green screen, you’ll need to guesstimate and transpose the position and timing of the actors from your main clip to the green screen. Having the main clip available as a visual reference and using some masking tape can be helpful.
| 1 | Compose your shot |
| 2 | Position your actor(s) to begin recording |
| 3 | Begin recording |
| 4 | Call 'action' |
| 5 | Act |
| 6 | Call 'cut' |
| 7 | Stop recording |
| 8 | Be sure to make note of the position and timing of your actors in this scene |
| 1 | Compose your shot |
| 2 | Position your actor(s) to begin recording |
| 3 | Begin recording |
| 4 | Call 'action' |
| 5 | Act |
| 6 | Call 'cut' |
| 7 | Stop recording. |
| 1 | Import all footage and location image into your video editor |
| 2 | Bring your main scene onto the timeline |
| 3 | Bring inset scene onto the timeline, being careful to place it above your clip. This will cover your main clip, don’t worry this was meant to happen. |
| 4 | In the effects options, find the keying effect and apply it to the over-lay clip. Your main clip should then be visible instead anything that’s green. |
| 5 | In the settings/options for your clip, you’ll be able to slide the opacity of your over-lay clip to give your ‘ghost’ a ghostly appearance. |